
Help Topics
Creating Your User Account
- You will receive two emails from us; one from Hive Admin and the other from Slack.
- Hive Admin: Open the email and select the ‘change password’ link. This will navigate you to an ‘S2 User’ Screen for you to choose / reset your password. Once completed, it will redirect to the Hive website
- Slack App: This app is used for team collaboration. Click the ‘Join Team’ link in the email and follow the instructions to create a username and password.

- Once these steps have been completed, Hive Admin will add you to the relevant team(s) – we will notify you by email once this is complete.
- One final step maybe required for the Slack App once you have your sign in credentials.
- On the ‘User Pages’ of the Hive site, click the ‘Collaboration’ tab on the left hand side.
- Scroll to the bottom of the chat screen and click “Join This Chat”.
- Sign in using your Slack username and password
- Select the “Authorize” button
- This should then allow you to see the relevant project chat channels (denoted by a ‘#’). If you cannot see them right away, try refreshing the screen.
Each of these steps only needs to be taken during the initial set up – when you log in / off in the future all the accounts will be linked.
Navigating the User Page
Once you have logged in, you will be taken to the User Page – this is where all the action takes place! The column on the left has four options:
- Project Files: This will link you directly to Google Docs and the files for this project
- Collaboration: This is a chat window for the project, where you can see tasks and chat with other team members throughout the project.
- Timesheets: Here you can log your hours as you work on the project.
- References: This is a searchable section of useful guides, documents and educational material to assist you with the projects, and beyond!
What you will see on these pages will depend on what the Hive Admin has signed you up for. If you are just a member but not tied to any particular project, you will be able to access the general chat streams and the reference documents.
Project Files
This tab connects directly with Google Docs, which you will find the relevant project files and folders. Navigation is pretty intuitive – select a folder to see the files within. Clicking on the document will open it up for you to read or work on. Google Docs allows the team to collaboratively view and edit files, with multiple users being able to work on the same document simultaneously.
Any type of file can be uploaded to Google Docs, and certain formats such as Excel and Word can be converted into an accessible document for online editing – this will be completed by your project lead!
When you select a file, such as a spreadsheet, it will open up and allow you to view / edit the details. If you are familiar with Microsoft Office products such as Excel, Word and Powerpoint, then GoogleDocs will be quite similar. The following image shows a typical interface for a spreadsheet:
1: Use the ‘X’ to close the window, and the square icon will open the document to a full screen
2: Here you will see who made the last edits and when. If someone else is active on the document, their name will show here in a bold colour.
3: Simply click on a cell / part of the document and start typing. No need to hit save, as Google will do this automatically.
4: Like with Excel, there can be multiple tabs, so be sure to be aware of these!
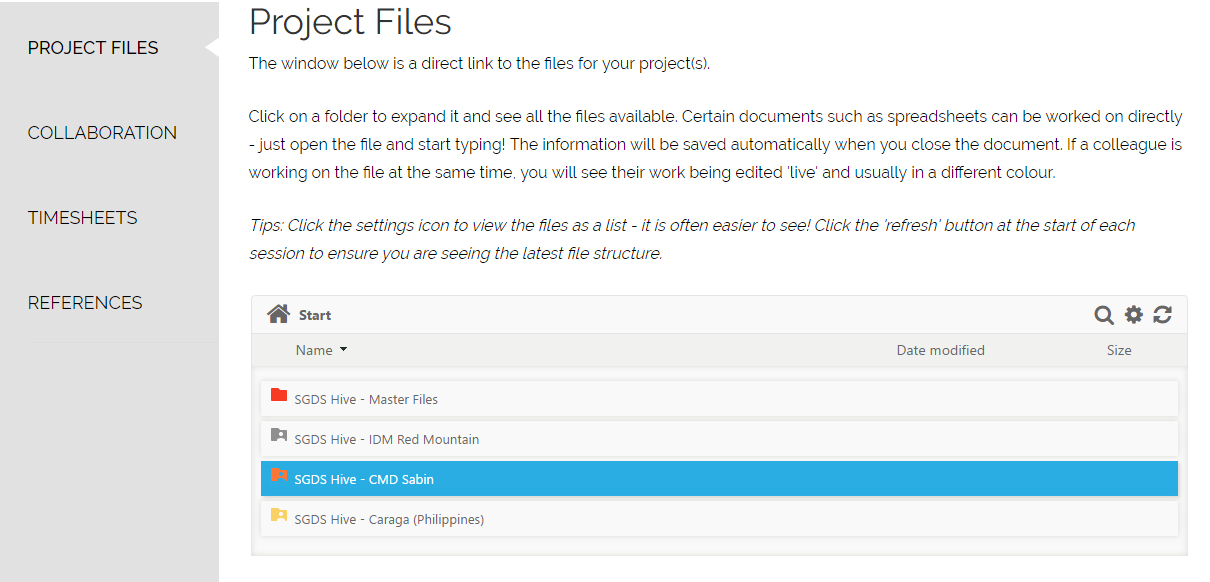
A few tips on navigating the Project Files!

1 – Click the home button to navigate back to your root folder
2 – You can sort folders / files by name by clicking the small down arrow
3 – Navigate back to the immediate parent folder by selecting ‘Previous Folder’
4 – Search for documents
5 – Click this settings icon to display as a list or a grid
6 – This refreshes the window, a good thing to do sporadically to ensure you are seeing all of the documents!
Collaboration
This feature is at the center of Hive, and allows all team members to share ideas, learn new things and keep a project moving forward! When you log in, you will see the main chat box, with a list nested on the left, Each item in the list starts with a hashtag, and represents different channels.
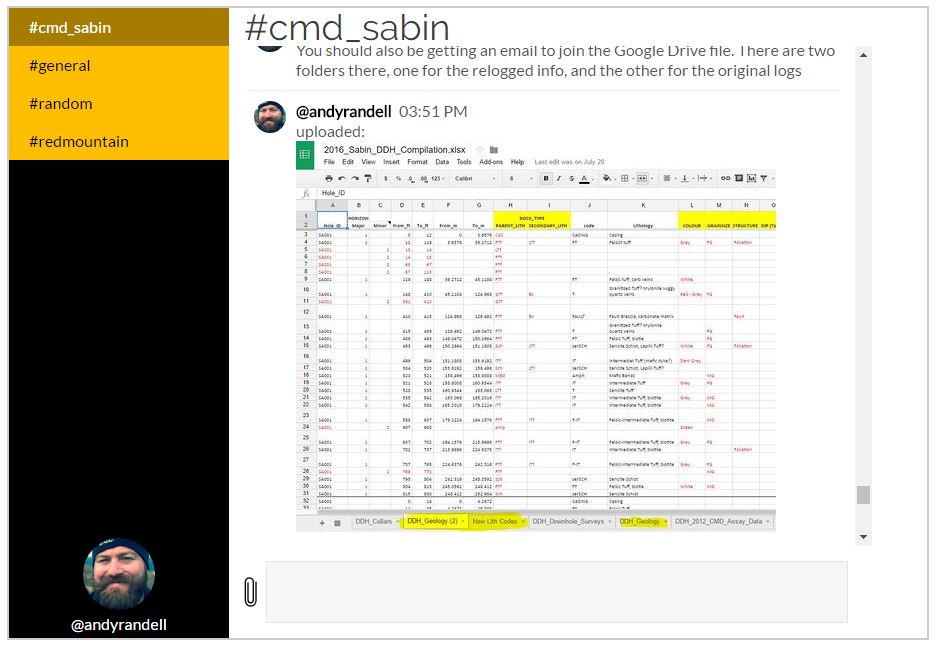
You will only be able to see project channels that you are assigned to, as well as the #general and #random streams. Select the channel you want to participate in, and then just type in the box at the bottom of the screen, Hitting enter will add your comments to the chat, and you can also attach files using the paperclip icon.
As you cannot add files to GoogleDocs, you can attach them to the collaboration chat room for the Project Team Leader to add to the relevant folders.
